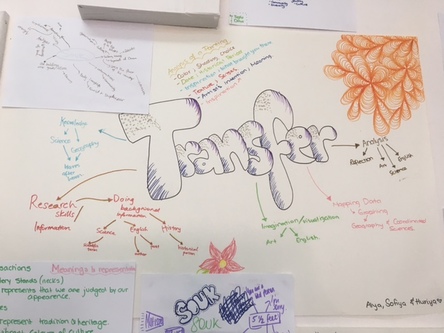
Mindmapping
|
This was our first mind map for this unit. We had to connect our "approaches to learning" skills and see the different type of skills we needed to use in our MYP subjects. Through this exercise, we learned that we use the same skills in different subjects, for example, we use research skills in almost every subject, even in contrasting subjects such as Science and Art. Another skill that we use in almost every subject is our analysing skills, which relates to our topic now. |
Connections

The Voyage of Life : Childhood
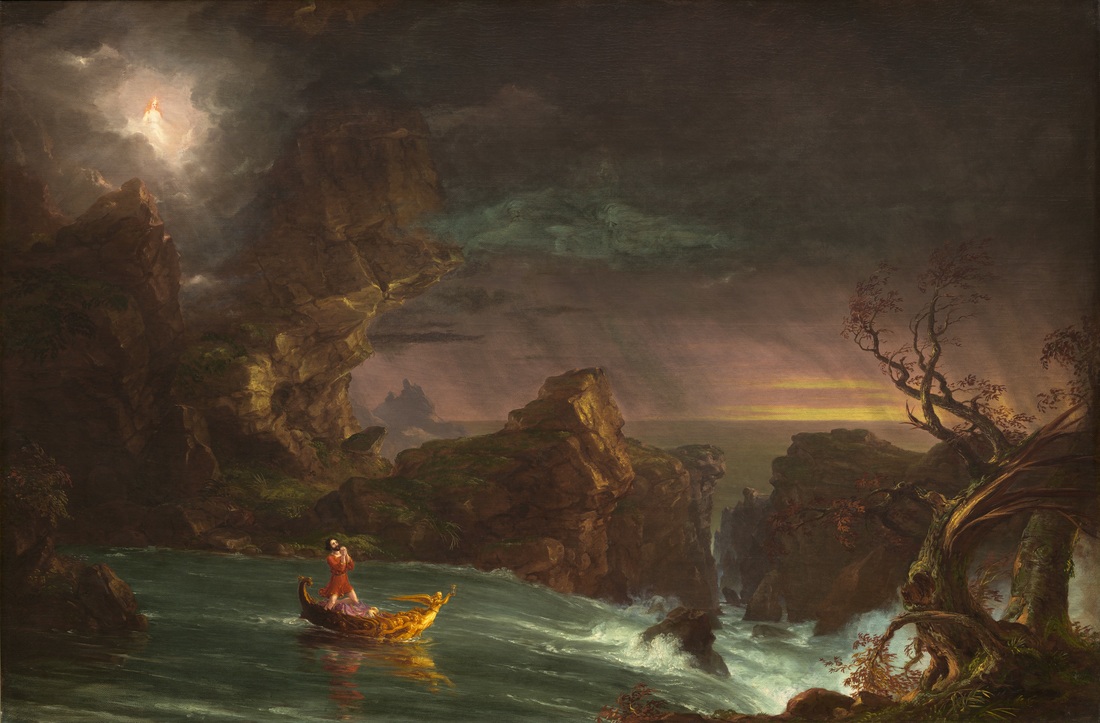
The Voyage of Life : Manhood
|
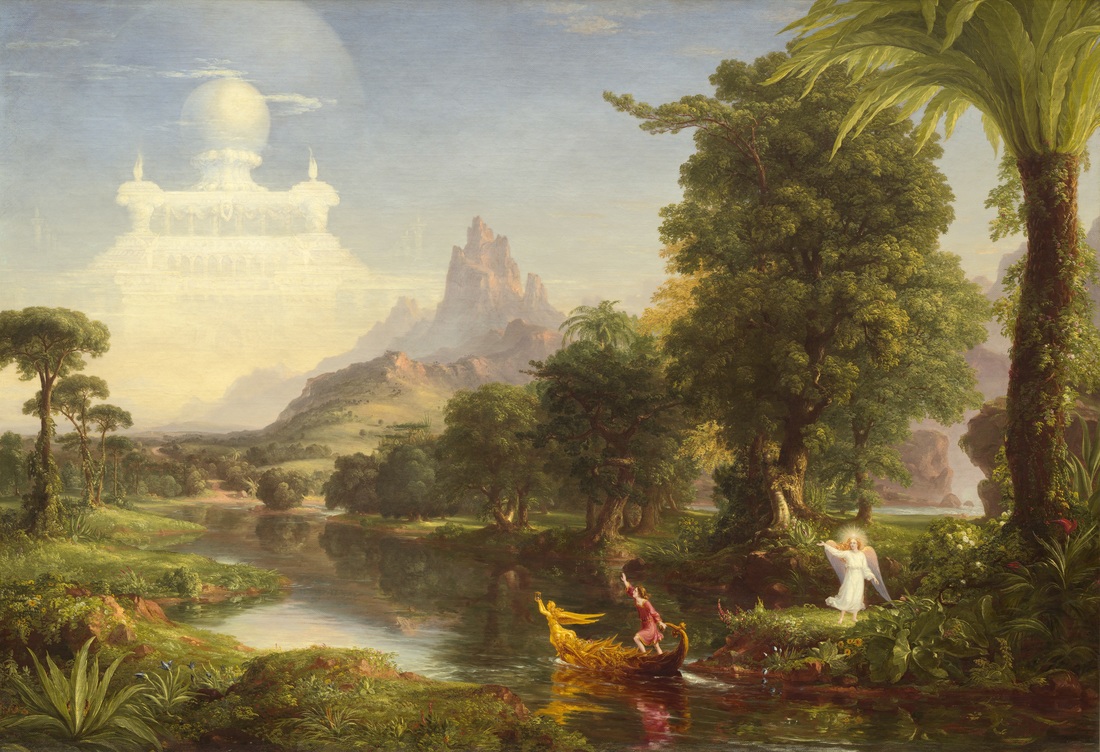
The Voyage of Life : Youth
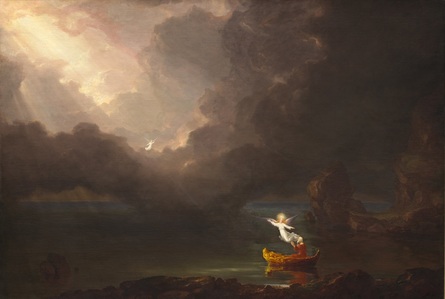
The Voyage of Life : Old Age
|
The painting that I have decided to study as part of my connection is a series of paintings by Thomas Cole which is called "The Voyage of Life". The series composes of 4 paintings, each visually representing a stage of life. The 4 stages are : Childhood, Youth, Manhood and Old Age. To read more about my interpretation of this piece click here
Observations
Introduction : Campus Photos
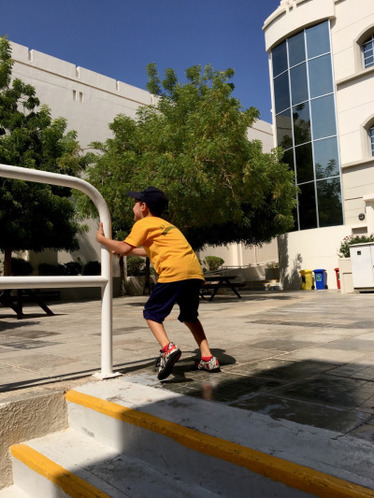
This photo was taken at an accidental moment. I was taking the background without the boy, using the rule of odds, and suddenly the boy came running fast. I realised that the addition of the boy was actually quite useful as he made the photo more lively, and his shirt matched well with the stripes on the stairs and the yellow rubbish bin, which sort of popped up the colours of the photo.
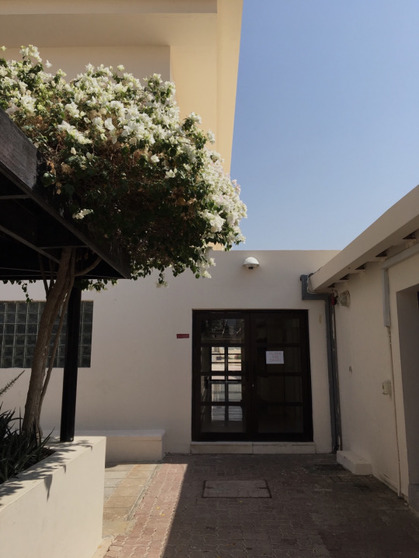
For this photo, I took the advantage of the shadows and the colours of the building as they were of similar gradient with the shadows. I used the rule of thirds to make the white flowers become the focus.
|
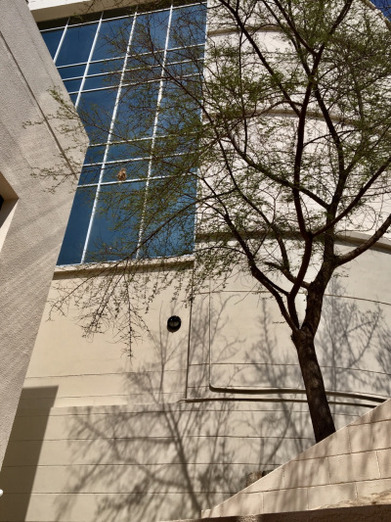
I took this photo from a low angle, to make the buildings and tree seem bigger and taller than they are. I tried to put the light focus on the shadow of the tree, which made it darker, and makes the photo more 3D and realistic
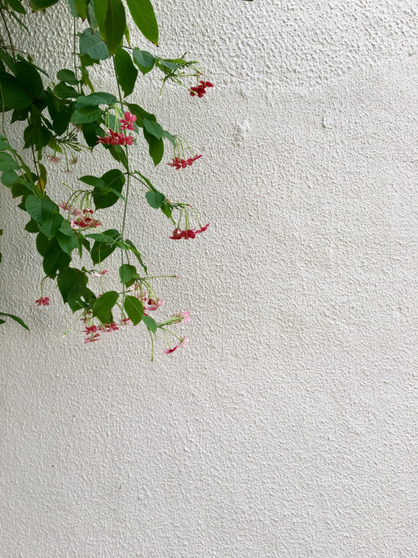
When I took this photo, I used the gridlines of my camera, so that I positioned the plant in roughly one-third of my photo, so that I could create a empty space yet, one side is filled, to show the idea of how empty space could be good space.
|
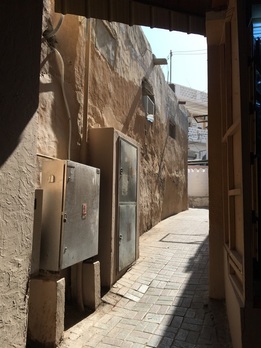
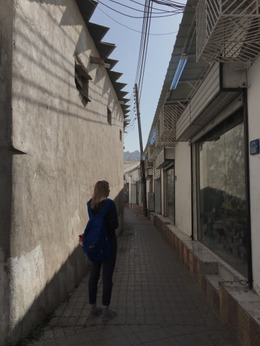
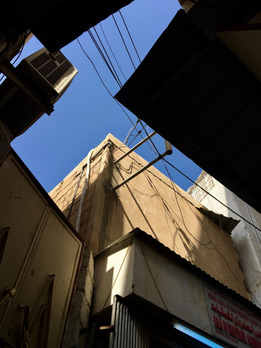
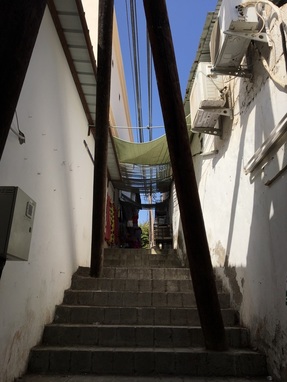
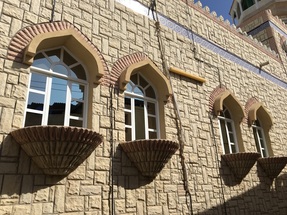
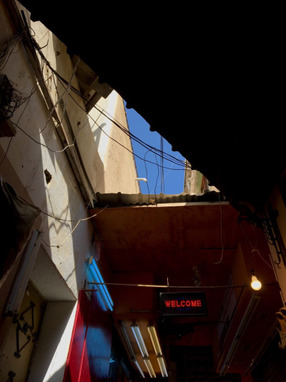
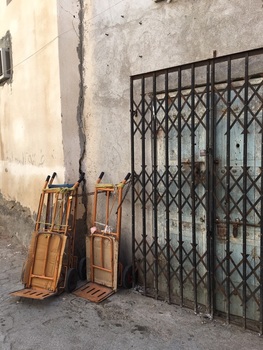
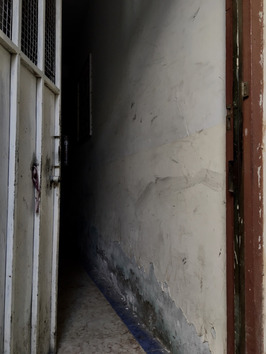
The Souq Exploration
|
|

|
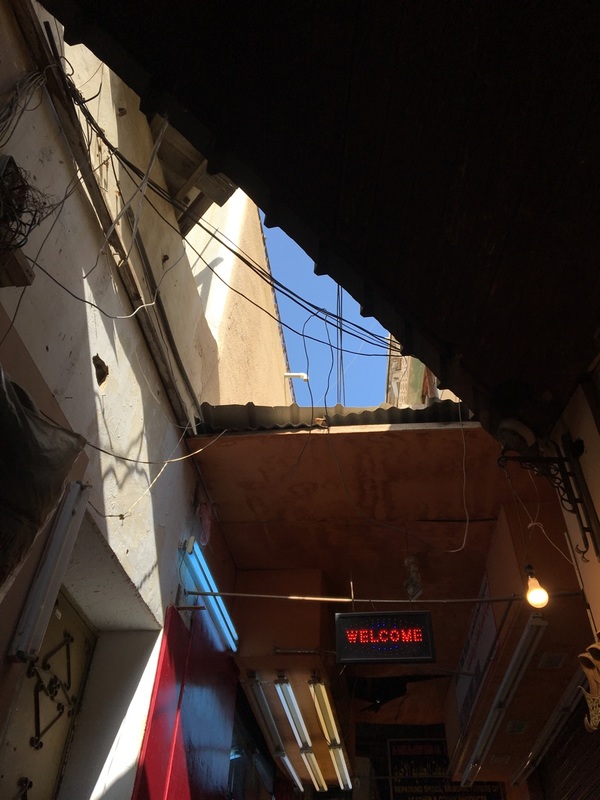
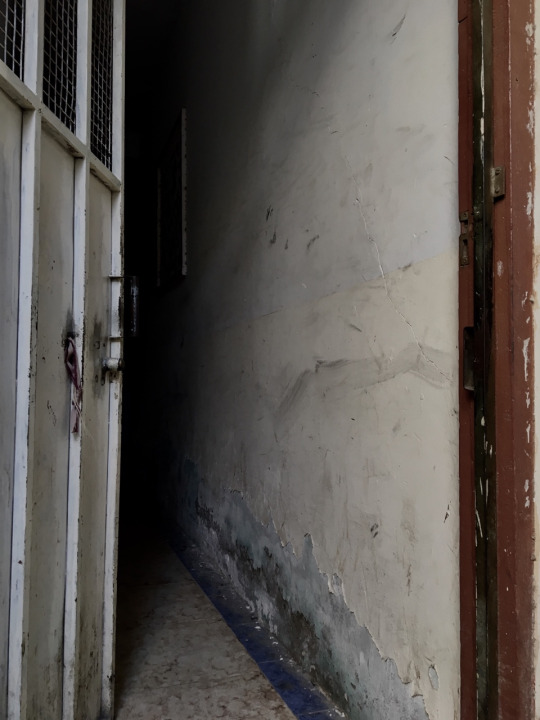
The Grade 10 Art Classes went to a field trip today to The Souq - Muttrah. We had to take photos for inspiration for our project. As I was taking pictures, I realised what kind of theme can link to the pictures I took. I felt a link towards the theme of "Journey" in my pictures. Most of my pictures were mostly alleyways and passages and I felt that I could link to unexpected journeys as we don't know what to expect as we take that pathway. It also links to us as teenagers, as we are experiencing the journey of life ; everything is unexpected as we take another step/path forward
Idea
|

|
|
I was thinking of combining these three pictures into one whole painting with the middle picture as my basis. I wanted to express the theme of the "Journey of Life", using the alleyways as a symbol of the direction of life and how the shops could represent as the conventional stages of life that we will have to go through, such as school life (high school, university), work life, marriage life and more. However, I'll add another pathway from the idea of the third picture, where the person could take on a different path and lead another life. The colours of the painting could come from the first picture, bright and neon, using the "welcome" sign to say that "Welcome, Let's go on the Journey of Life!".
Development
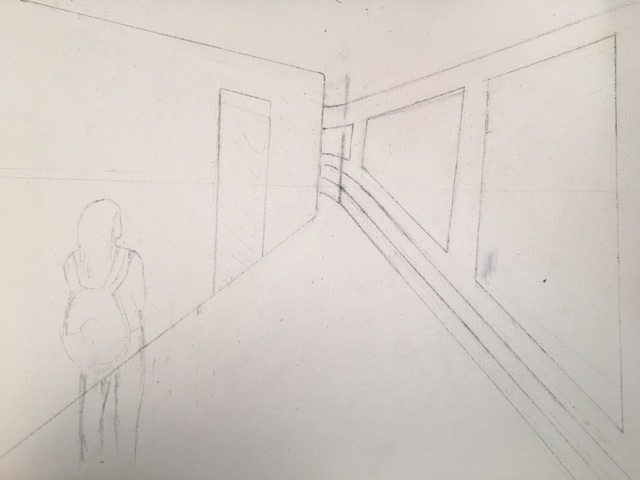
Draft

|
This was the outline or first draft for my painting. I wanted to get an overall sense of what my future painting would be like. Additionally, it was useful to do this first outline as to practice the idea of view point as I was struggling with trying to figure out the scale and how I should form my piece. Throughout the process, I used this first outline as a guide to doing my final piece |
|
This was my first try at doing the final art piece. The surface that I chose to use was a board as it it much more stable than a canvas, which is useful as I would be adding more detail. As you can see, this version is very, very rough drawing and I will be fixing it later on. |
|

|
As I was adding detail to my artwork, my art teacher suggested that I painted a base layer first as I will be doing much more detail later on, which will then be harder to paint the piece. I took in his suggestion and started to do a base layer. From the picture, it looks very rough and messy. From this, I plan on improving the artwork, and because of the base layer, it is easier to tell the elements of the artwork better, which makes the process easier. |
|
In the next art lesson, I decided to add an "olden" texture to the side which will be representing the conventional stages of life. To do this, I searched up pictures of wood textures to have a reference for my painting.
The reason why I did this was because I felt that the conventional life where an individual studies, graduate, goes and find a career (and sometimes for women get married as quickly as possible), retire and die without doing something out of the ordinare is quite an old practice and it's something that the older generation would ask / demand for. Also, in my opinion, the wood texture really evokes this "old" feeling, as in my country, people living in olden areas usually live in these old "kampung" houses (basically, a village) which are made by wood. So, I got reminded of that and wanted to portray that in my drawing. I used watercolour pencils instead of paint to draw these wooden textures as I have more control over the pencils than with paint, so it was easier to draw and create the texture. |
|
|
|
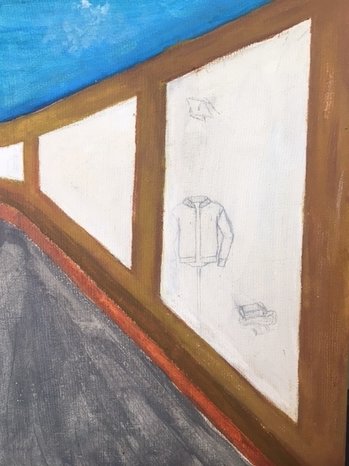
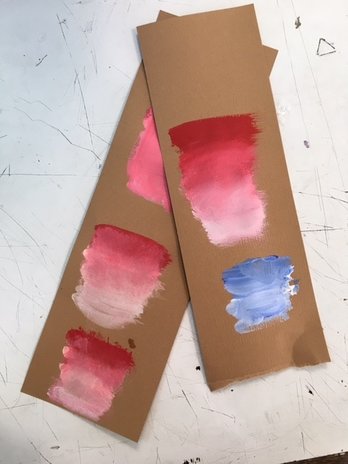
For the other building that will represent the other side of life, I will use a gradient method. Firstly, I had to learn how to make a clean gradient that wont show the lines of transition. I felt that the gradient and the choice of the color pink would really show contrast to the conventional side.
|
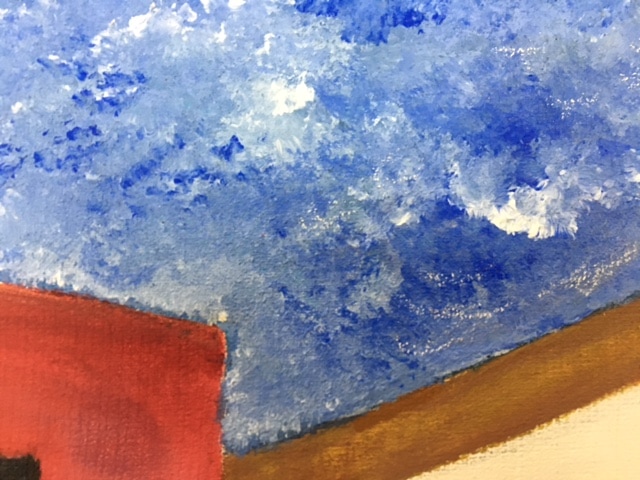
I got inspiration to paint the sky like this from a painting I saw by a user on tumblr. I found the way the user painted the sky really realistically. |
|
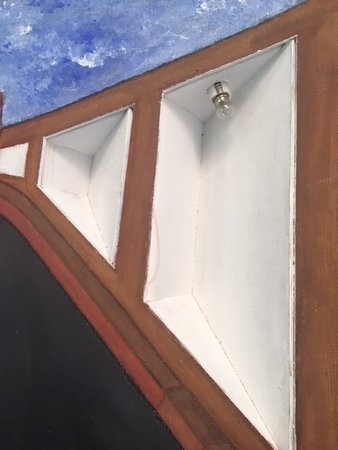
I decided to make the stores pop out ; making it more 3D. I did this by cutting out the piece of board that was the store and used card to cover the other sides. I then added a light bulb so that it will act as a light, which will then bring the attention of the store. I did this to emphasise the realistic view of the conventional side. |
|
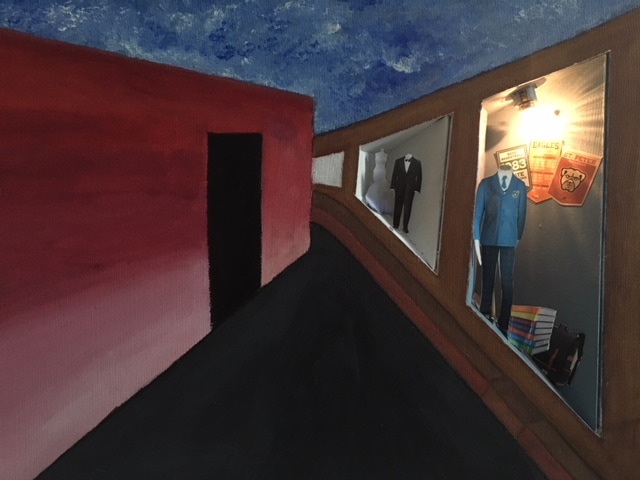
Final Product
Artist's Statement
The aim of my piece is to show that there isn't a single pathway to life. I've done this by using a scene in shopping street where one side shows stores. Inside each store, it would represent a phase in life. For example, the first store (the closest one with the light) shows the phase where an individual is at school ; youth basically. I added in the elements of school such as books, uniform and heavy packs. I added in the light to make it more realistic and also, I incorporated the idea of warm light symbolising as innocence and youth, as what was shown in Thomas Cole's series of painting, "Voyage of Life". The next store is marriage. For me, I consider marriage as one of the key things that represents adulthood. Here, I added in a bride and groom (which doesn't really have to be that way in this modern world).
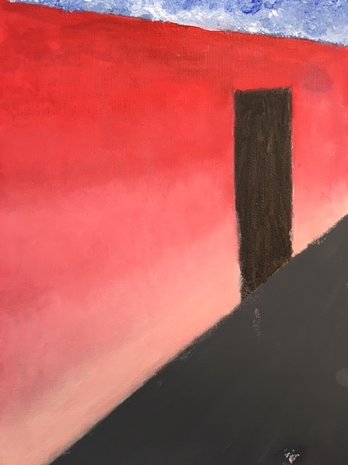
However, for the other side, I painted it in pink gradient with a door completely black. The bright pink would really stand out and attract the audience, which also then conveys a layer of meaning of the "other side" (that the other side would attract a person more than the conventional life). By painting the door black, it creates a big contrast with the bright pink. This is too show that risks comes with big consequences and that this other world is not as wonderful as well.
A reason why I did this topics is because in this stage of my life, I have to make such big decision. Going to college or not, choosing the subject I want to study, the future career I want which will then result into my living. There are times when I just want to give up and just not do anything. However, the only way to get over this is to keep moving forward (which was what the continuous road was meant to symbolise). I can't just change how I want my life to be as it's not only me that is going to be affected, but those around me. If I suddenly just give up and take another route in the middle, it wont benefit me at all. However, if I try to lead a perfect, conventional life, it wouldn't make me happy. So, for me, moving forward is what I have to do and keep pushing on as I overcome the ups and downs, just like Thomas Cole's "Voyage of Life".
